13 September, 2012

Steampunk Mechanical Arm

As mention in a previous post, the building of a Steampunk Dueling Pistol, I'm a member of the Dublin Steampunk LARP Society.  The LARP is set in Dublin, in the year 1862.  My character is an Inventor/Business man who makes technological oddities for people who will to pay him.  Much like what I do!  As part of the characters background he lost his right arm and eye in an accident at this workshop many years prier but was able to build himself a fully working mechanical arm, because you know "Steampunk".  This of course means I need to have the proper costume piece to wear in game.  When the LARP started I had a poorly thrown together arm, made from card wrapped in tinfoil.  But when I had this arm signed by Professor Elemental at a Steampunk Burlesque night I decided to retire it as I didn't want to destroy the signature.  This of course forced me to create a whole new arm.  My girlfriend found, and bought me, several sheets of "Funky Foam" which turned out to be a really good building material.

Since I'd already built one arm I use the shape of that to recreate the updated version.  I started with the hand, remember how much of a pain it was to do the first time round.  I also learned from my mistakes, and taking a page from Punished Props Dragon Age 2 armor build I cut each piece on the fingers so that they would over lap for when I bend them. Because the more you know, and knowing is half the battle.  Yo Joe.

I spent a weekend looking for a decent glove that I could use a the base for the gauntlet.  Failing to find one I bought the cheapest set of gloves from Pennys that looked right.  I did a test on the first finger to make sure I'd gotten the cut right and what do you know I did.  See my previous "Yo Joe" statement.

This was then repeated four more times for each finger with a hand guard was cut and glued on top of the gauntlet. Which over lapped the fingers.

Then the forearm was measured and cut out, again using the old arm as a template for the shape.  I have a beautifully made leather Steampunk shoulder guard, which may one day be replaced but for now I only need to worry about making the lower arm.  Got my hands on strips of Velcro to be use for taking off the arm at the back and added a extra strip of foam to make it look like it has a piece of metal bolted the arm closed (not seen in pic).

Once the base was done I moved on to painting and "damage".  Since my character works with huge machinery and the likes the metal on the arm, as well as the leather, has been scraped and scared over the years.  So all this weathering was added with my trusty dremel.  Since I was also going to have layers of detail simulating different layers of leather and metal I painted as I went, not waiting for the whole thing to be fully assembled before the painting starts.  Which is what I would normal do.

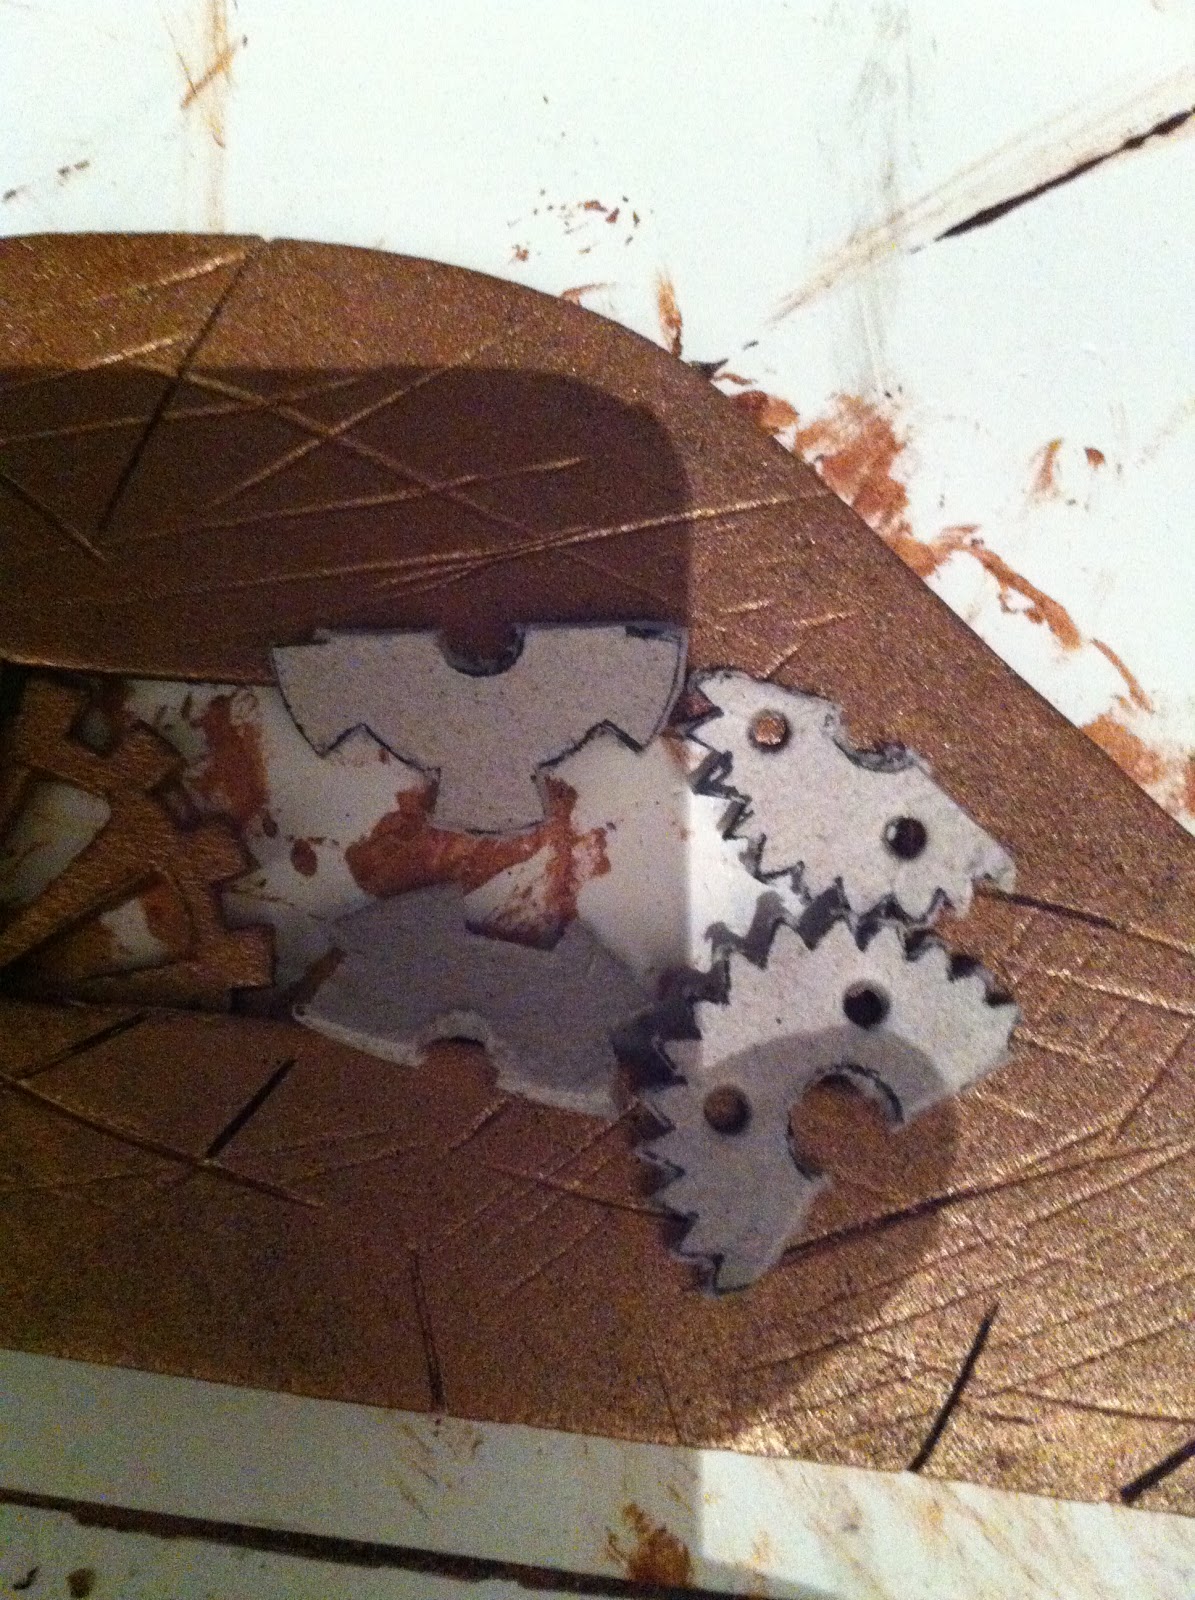
Seeing as how it's a Steampunk LARP the costume piece had to have cogwheels in it somewhere.  I wanted to look like the cogs did something and where not there just for show.  So they were added in two area.  One on the top of the gauntlet, showing the clockwork that made the fingers work.  The second was just before the wrist on the forearm section.  The cogs where cut from card and then coloured in a brass/copper paint.  You can also see the extent I went to with the weathering on the metal of the gauntlet.  This is also why I had two layers of foam on the arm.  It added a nice sense of depth when looking at the clockwork giving the feeling that it's not just cogs on top of the arm, they are inside it.

The studs on the fingers and knuckles I found, randomly, in a hardware store.  While the smaller ones are thumbtacks with the ends cut off.

The forearm was made in much the same way.  The cogs where given a sliver coat over the copper for a bit of variety.  I took a bit of inspiration from other Steampunk arms that I'd image searched, the piping being one of them.  This arm was been built at the same time are the Steampunk Dueling Pistol hence the reason for the piping on the gun.  Here it made more sense as the arm is "powered" by steam.  The pipes where just 0.1inch plastic tubes that I heated up and bent into shape.  Then painted gold.

A while back I got my hands on some vacuum tubes that my college was throwing out and I though that now would be the prefect time to use one.

What I learned from this build is that foam is really easy to work with and I am no longer averse in making costume pieces for people.  Also Steampunk themed props are really enjoyable to make, apart from all the cogwheels that needs to be cut out.

-M

12 September, 2012

Steampunk Dueling Pistol


I play an inventor in the Dublin Steampunk LARP Society.  The game is set in Dublin in the year 1862.  One of the characters there ask me, in game, to build them a dueling pistol, as they'd called out a member of the society.  Then the player ask me to actually build the pistol as they could carry it around.  I of course say yes.  I was given free rein on the design of the pistol.  So I decided to make it a three barreled revolver, which the player was happy with.

I returned to my old friend, balsa-wood as I did not have the time to build the prop out of anything else.  The handle and body were carved separately as I could find a bit enough piece.  I started with the handle.  I modeled the basic shape of the gun off the Hellgun Dueling Pistol from the Rouge Trader book.  It's where the finger grips design came from.  This part was not to much work, just a large amount of dremeling to get the grips to stand out.

The barrels of the gun were cut from 0.5inch plastic piping I got from my local modeling shop.  Then super glued together.  The chambers for the bullets were cut to an inch in length, glued into the same shape as the barrels and then glued onto a 0.2inch pipe.  This would act as the pivot point for when the chambers needed to turn.

Another 3inch length of balsa-wood was cut and shaped to fit the under side of the gun so the barrels would feel part of the gun.

This was then attached to the main body of the gun.  The carving of this was pretty effortless, with the only really problem coming from the trigger guard, as I didn't want to snap it off.  The central part, where the chamber fits, had to be carefully cut away and sanded down so that the spin was unaffected.

This just took a lot of trial and (little) error.  The barrel wasn't glued into place yet as I stilled need to paint the whole thing but this was just to check that the chamber was free to spin around.  I also took a light grain sandpaper to the barrels, seeing as now they where meant to be brass I did not want them perfectly smooth.  A small amount of Polyfilla was put on the nozzle in the pic to seal it over.

For a little bit of extra detail for the handle, I cut out a skull from card and glued it on.  This was another design choice lifted from the Hellgun.

Then the handle was then glued in place, with a small amount of Polyfilla used to cover up the seam.  As I wanted the whole gun to look like it was carved from one piece of wood. The trigger was just three strips of card cut and glued into shape and position.

I used a dark woodsheen to varnish the body of the gun and brass paint for all of the other details.  Something I normal worry about (ie: painting taking Days to finished) went but within a few hours. as the body barely need a second coat of paint and the brass paint drying quite quickly.

As I was working on a second Steampunk project at the same time as this I had some spare cogwheels lying around, so I added them.  As something is not properly Steampunk until it has some cogs in it.  In this case I placed the cogs to give them an "in game" reason for being there.  One of them was set to be the firing mechanism and the two at the side for turned the bullet chamber.  I added a coat of gold paint onto the skull on the handle as well as two of the cogwheels to give a bit more variety.


There was also this pipe added to the side because of "Steampunk" reasons.  Either way everyone who saw it at the Steampunk LARP game though it was a damn fine pistol.  So I was happy with that and the player was happy with the gun. So Win/Win.


I'm hoping that this will lead to more people asking for me to build them Steampunk props for the LARP game.  What I did learn from this build is that cogwheels are murder to cut out and will take up your whole day.

-Matty

11 September, 2012

Star Trek Phaser

Got a commission to build a Star Trek phaser from TNG for a Sci-fi themed birthday that was coming up in two weeks.  There is something about me, crafting and short deadlines that get on really well together =D  I started with a good old fashioned Google search and sketched up a design from there.  Since I'd be making this one in my home workshop I figured balsa-wood would be the best material to work with, since all I had was some scalpels and a dremel.

I started by making a 1:1 scale drawing of the phaser and cutting the balsa-wood to the right dimensions.

From there it was a matter of carving out the phaser from the wood.  This was done roughly at first then more and more of the basic detail cut out once I was happy with the shape.  The handle was the trickiest part to get right so that it curved to the shape of the hand.  I also had to cut everything deeper than the design called for as I knew I would be covering the model in Polyfilla to smooth it all out.

Card was then cut out to give the front more shape and the whole model was cover in a layer of Polyfilla.  It about this time that the sanding started.  The phasers on TNG always have a clean, plastic look to them so I knew that I'd have to get it perfectly smooth.

More details such as the buttons were cut out of card and glued in place.  The front nozzle of the gun was cut from some left over balsa-wood.  Again these where all smoothed out

Then came the most time consuming part of the build.  The handle grip.  Dremeling out the groves was easy enough, I just have to take care to get them perfectly straight.  It was the sanding and smoothing out that took hours.

Finding the correct colour for the phaser just took a trip down to my local Game Workshop.  Weathering was nothing something that could be done here as it's Star Trek and everything is new and clean.  But that not to say none could be done. I added a small amount of wear on the grip as well as the rim of the buttons.

Over all I'm happy with the way it turned out and I got the scale just right, which was one of my biggest concerns.  But most importantly the client love it and that's all that matters.

What I learned from this, balsa-wood is both a god send and a curse!

-Matty