30 August, 2011

Commission and things to come.

Seeing as how college is just around the corner I though I would give you guys a taste of what I'm working on as well as seeing if I can get some commissions to help with my college fees.

I am current working on two head pieces, both for Halloween costumes. The Rocketeer Helmet and the mask of the Nazi Assassin from Hellboy.


Never worked on helmets before so these are going to be a challenge and that is why I'm doing them. None of these quick and easy builds for Matty, no sir! Mostly 'cos I want a job straight out of the gates when I finish college and playing it safe and easy wont get me one. I have the technique of how to build them, I just need to put it into practice, which I plan to do once I hit college. I might even start before hand, just so I'm not wasting time sitting about waiting to do them. Once these are done I will only have college projects left to quench my appetite for building so I move on to the second half of this post.

I want to open up for commission so that I'm constantly trying new things in my builds and also because I need help with money at the moment as my college fees are causing me great discomfort. If you've had a prop from a movie or game that you've always wanted, a weapon, helmet, gaulet. Or you're a preformer and looking for a new set piece for your act feel free to send me an email at: missingpegbar@yahoo.co.uk with either a picture or a description of what you are looking for and I will be happy to build it for you, for a price.

Well here is to a great year of college. Enjoy.

-M

16 August, 2011

Pac-Man lights

I got the ides for this after stumbling upon an image of Pac-man hanging from street lights. I knew that they would make a pretty sweet birthday present for a friend of mine and being poor crafted gifts are always best.

I got myself a few sheets of .08 tick plastic and had original planed to use a heat gun to curve strips of the plastic to make the tops of the ghosts and pac-man himself. But it was pointed out to be that would be adding way to much work for myself and to just use a large plastic bottle. After I faceplamed myself I got to work. 1 inch thick strips were cut from the bottle to make pac-man and the tops of the ghosts.

I used the top of the bottle to measure out the curve of pac-man and the ghosts on the plastic sheets. They were going to be fully encased so two side needed to be made for each model. I let myself be a bit mess on the cut of these as I knew I was going to trim down the edges once each one was fully built.

Hot glue was used to attack the sides to the base. The only problem I had with this was that the glue had a tendency to melt the bottle so I had to play a tricky game of letting the glue gun cool down enough as to not melt the bottle but still be glue-able. Once the tops where in-place I measured out and mouth pieces and sides for the ghosts from what was left of the plastic sheet.

My biggest problem with the build was the lights. I was able to find really cheep Christmas tree lights in town (pic below). A set of 40. Now I only want the string to be 15 lights long so I went about a bit of rewiring, cutting away the excess of lights and having a string of only 15. Now sadly me knowing little on the subject of electronics led to me blowing out every light on this newly rewired string and there was to much current going through for the poor lights to handle. But we live and learn.

Luckily I was able to find a second cheep set of Christmas tree lights in town. A set of 20 this time. The only problem with these was that they had little stars on each of the lights that I had to carve off. This took a while to do and four lights where damaged in the process but by the end of it they worked and I was happy.

Once the side where glued in place I made cuts in the curved tops and set up the string of lights in place. I wanted to make sure that there was no chance of them turning over so I placed the holes for the light high enough to prevent this. Once I was happy with their placement the cuts and holes where glued closed.

The last of the build was to glue in place the other face of all the ghosts and pac-man. This was a bit tricky but only when it came to gluing the curved tops to the body. Once each model was finished and set I went about dremeling away any excess plastic on the edges before painting could start.

I just normal acrylic paint for the bodies, only a two coats as I wanted the light to shine through and the spines where done in black to maximise the light coming out the faces. Once the faces were dried the eyes were added and I was finished.


And here we have them finished with the lights turned on. Granted it's not that dark so the full glowing effect can't been seen but I am happy with now this project turned out and right on schedule as well, which is always good.

10 August, 2011

Magic Roses

This was a very recent project that I finished and a very personal one. Beingflat broke at the moment kind of sucks. But there was the up side, I decided to created some roses out of Magic the Gathering cards I have for my girlfriend. She is a huge MtG fan and I'm a hopeless romantic.

I decided to make a rose for each of the five colours in Magic, using the mana cards. I cut out three different sizes for the petals. Then, starting with the smallest, I curled them around each other, quite tightly, to form the center. Folding out the other petals to make it look open.

The larger petals were then hot glued into place. I cured the edges of each of the large petals to make sure they had the proper look.

Once I knew what I was doing I cut out, curled and hot glue the four other roses together.

I made the stems out of wood I had at the work shop, painted green, and used green mana cards to cover up the joined between stem and bud.

The base was made from a block of wood that I cut and sanded into shape. This was the most work out of the whole build. Once the shape was gotten I drilled holes for the stems to fit in, going in a curved shape around the front of the base.
And here is the finished product. When I had it finished something was bugging me about the way the rose sat, but I wasn't able to figuar out what till I got home. The huge gaps between each head looked offal so I trimmed down the stems on the upper roses to give them all a nice flowing feeling.


Heavy Bolter part 1: The build


I am a huge Nerd/RolePlayer and I really enjoy the Warhammer 40K Universe and the games that are set in it, Dark Heresy, Rouge Trader and its newest game Deathwatch. A few months ago we started playing Deathwatch and I chose the Devastator as a class. Their weapon of choice the Heavy Bolter. At the end of one of our session it was mention that if we could only come in costume we could get more XP! Well since making Space Marine Armor was out of the question I thought I would do the next best thing, make a scale model of the Heavy Bolter my character uses =D

I worked out the scale from the images I got off the web, using the barrel size as the reference point. Since it is a two handed weapon was by the end was going to be pretty heavy I started by making a spine for the gun. Internal panels were put on both sides so that the body would be good and strong. I just 1/2 inch MDF for these piece and 1/4 inch MDF for the shell of the body to try and keep down the weight as much as possible. The barrel was made from a 5"Hard rubber water pipe. At the start this is where most of the weight came from so I was worried she was going to be from heavy, but that sorted it's self out later, when more was added on.

The handle was going to be made from clay but that didn't last to long so I glued two piece of 1/2 inch MDF on either side and sanded them down into a nice curved hand grip. The Mag for the bolter was a tricky build, and something I didn't have s ref image to go off as a Heavy Bolter is belt fed. I also started using polyfiller to fill in the joins between the wood and cover up the holes of the nails. This stuff worked wonders. I also remember that I had to put in a breach from the shells to exit.

Sadly I don't have any proper woodwork clamps, which time and time again would have been a God send, so I was forced to impervise with what ever heavy weights I could find. But about half way through the build I found this purple clamp which was used to securer the undercarriage for the barrel. A second hole was cut above the barrel for the scope, which was just a short piece of 2" pipe I had a home from another build.

Were as the clay didn't work for the other handle it did hold for this one. I glued it in place to make sure it wasn't going anywhere. I roughly sculpted the shape and once it was safe to work on, I sanded it smooth and into a more defined shaped.
Once the main body was finished I started carving out and shaping the external details. Nearly all of these where made from either 1/2 or 1/4 MDF. I just followed the details that where on the images I got off the internet. I'm not sure what any of these extra dodads do but who am I to argue with the design of Games Workshop.

I found little studs at home from some leather work I did in the past and they worked perfectly as added detail. The breach was a tricky one. I sanded down a piece of 1/2 inch MDF until one of its sides was curved. Then glued it onto the inside of the hole to give a nice sense of depth in the prop. I then just covered the breach. I've learned from this that I need to get a better sander.
The same details where added to the backside of the gun, minus the breach. Once again the polyfiller was a great help here as I use clay at first to fill those gaps and holes but it didn't sit right. Once all the polyfiller had set I sanded it all down till it was flush with the model. I cleaned it down to remove all the dust and she was ready for her first coat of primer.

09 August, 2011

Rocky Horror Laser

I'm a Huge Rocky Horror Picture Show fan and I'm part of a Rocky Horror troop. We put on a show three times a year and the one thing that has always bugged me is the prop we use for Riff Raff's Laser at the end of the show. It was a devil's pitch fork with tin foil wrapped around it. So I build a proper laser.

It started, like all good prop builds do, with a few lengths of pipe cut and drilled to size. The main body was 2" and the handle 1". I used copper pipe at the points of the laser.

This was the only really difficult apart of the build. I tired using a bending pipe to get a nice natural curve but without any luck so I was reduced to hammering and bending it by hand. Not pretty but it worked.

I used a container from a kids toy you get out of vending machines at the cap on the end. A screw in cap was used to hold the middle piece in place.

Clay time. I used Milliput on the all seames, the tops of the copper pipes and the dents in this curves to give the whole prop the look of being one piece. Once the Clay was hard I sanded it down smooth.


The lighting bolt on top was a last minutes addon, before I primed the body, as I had almost forgotten about it.

A few coats of primer and Shiny Gold paint later and we have the finished prop ready for its debut on stage.

Chaos Imperator Titan

During the building of the Titan I mention that for the next years Con we could make a Chaos version of this Titan. So about May of 2010 I started designing out how the Chaos Imperator Titan would look. This build was a solo project as I lived outside of Dublin and it would have been to difficult for anyone to come up each day to help build it.

Imperator Titan

As a friend of mind was the Con Director for Gaelcon in 2009 he set about the task of build a 4 foot scale model of a Warhammer 40K Imperator Titan. When I found out about this I offered my help and built the cathedral that sits on top of the war machine.

Each tower was made from plastcard (something that I will not be using again for such delicate builds again any time soon) This part was just lots of cutting and shaping to get each one perfect.
Cardboard was used to mimic the detail of columns going around the towers and thick plastic sheets made the stepping details on the roofs
A larger dome was made of the centre in the same manner as the towers.
There was a lack of production shots taken due to the rush we were in to finish the Titan for the convention. To fill out the detail around the base of the cathedral we used store bought models for Games Workshop. This made up the back tower, the shield wall around the edge and the front gate to the cathedral. The little gun in placement on the corners were made by me out of plastcard.
Because of the time limit colouring was also left till the very last minute, in fact I spent the night before the con painting as fast and as detailed as I could so that she would be ready and on display for the morning.

Older 3D Models

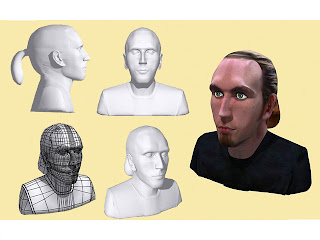
Here are some renders of head, body, environmental and prop models that I have made in the last few years.

Got a lot of inspiration from Portal so diced to try creating a portal effect.

Playing with perspective.

Made the Gun Turret from Portal
I was playing around with creating a low poly count model that looks detailed. It's all in the texturing.

Kid character from a group animated film I part of.
I use to be this skinny.
When teleshopping products go bad.